
Materials
Pencils
Sketch paper
Soft Air Dry Clay (Model Magic)
Modeling tool or Plastic Knife
Watercolor Paint
Brushes
Water cups
Tempera Varnish
Procedure
1. Discuss
creatures that live under the sea.
Together, using basic shapes, draw many sea creatures and fish found in
the ocean. Show photographs and
fine art featuring sea creatures and show students examples of sculpture and
bas-relief sculpture.
2. Each student
should receive about 1oz. of soft air dry clay. Students should quickly rip their chunk in half and roll
each chunk into a sphere. Have students take the larger of the 2 spheres and
flatten it into a pancake using the ball of their hand.
3. Using the modeling tool or the plastic knife, students will slice off the top of the pancake to make a fish bowl.
4. Take the sliced off portion (the top of the circle) and start tearing it into a bunch of small pebbles. Once they have a small pile, they may attach them to the bottom of their “bowl.” The soft clay will attach without hatch marks, slip, or glue. Students will just need to press firmly.
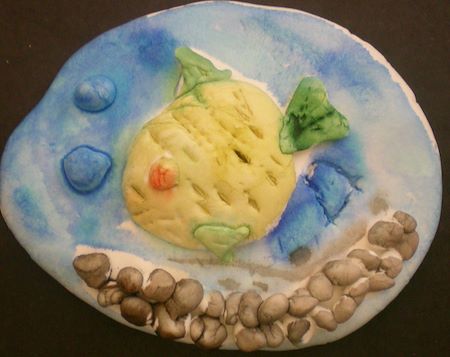
5. The second
sphere will then be flattened into a pancake. Using the modeling tool or plastic knife they will gently
scratch their fish or sea creature on this pancake. If necessary, demonstrate on
the board how to draw a simple fish using ovals, triangles, and circles. The
students will cut the fish out and reshape it onto the surface of the bowl. Using the rounded edge of the modeling
tool students may add texture to their fish to show scales. The extra soft clay may be used to add
plants or bubbles or more fish!
6. Once fish bowls have air dried, students will stain their
fish bowls with watercolor paints.
7. Finally, a coat of tempera varnish to the entire front side of the bowl will make the bowl shine!
7. Finally, a coat of tempera varnish to the entire front side of the bowl will make the bowl shine!
No comments:
Post a Comment